Vendor Code: Meaning, Creation, Examples & Registration Guide
In today's competitive world, your business might face scalability challenges if you don't know how to manage vendors. Let's not forget how vital the stability of vendor management is during supply chain disruptions. But, when it comes to vendor management online, you first generate vendor codes.
This is like a unique identification code for each vendor to note the transactions between your company and the vendor. Vendor codes are your easy hacks to maintain accurate records, maintain swift communication and do smooth transactions. But, for new users, generating and using vendor codes might feel overwhelming.
Read this article to learn the meaning of a vendor code, how to create and register vendor codes, and much more. Your journey on how to master vendor codes starts here.
Meaning and Purpose of Vendor Code
It is the unique alphanumeric identifier designated by a business to any vendor or supplier. Organisations can use this reference code to see and control their transactions, contracts, and communications with the vendor.
Purpose of a Vendor Code
- Simplified Vendor Management: Vendor codes allow your supplier information to be organised and pulled together in an easy-to-use format.
- Accurate Tracking: The codes get these vendors to be looked after precisely and correctly, as well as the invoice process, payment process, order history, etc.
- Error Reduction: Using vendor codes also saves businesses from manual data entry errors and vendor record duplication.
- Compliance: The record keeping of suppliers is also of utmost importance to meet the regulatory requirements, and vendor codes act well here as well.
How to Create a Vendor Code?
Creating a vendor code is a key step in onboarding suppliers into your ERP system, both in SAP and Oracle Fusion. The process typically involves collecting vendor details like PAN, GST number, and bank account information, and entering them systematically into the ERP. While SAP and Oracle follow different approaches, the objective remains to ensure accurate, standardised vendor records. Below is a step-by-step comparison of how to create vendor codes in both SAP and Oracle Fusion for Indian businesses.
| Steps | Creating a Vendor Code Using SAP | Creating a Vendor Code Using Oracle |
| Step 1 | Define Account Groups with Screen Layouts (OBD3)
Account groups categorise vendors based on shared characteristics and determine which fields are mandatory, optional, or hidden during vendor master data entry. This configuration ensures consistency and streamlines data maintenance. Transaction Code: OBD3
| Go to the Supplier Creation Task
Inside the application, click on “Create Supplier” under the “Suppliers.” Now, a Create Supplier dialogue box will pop up.  |
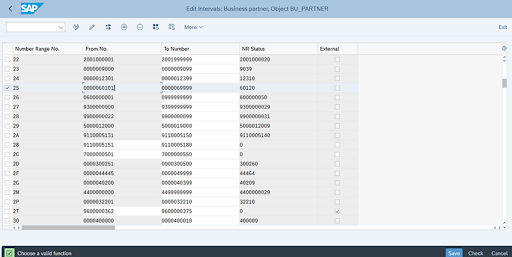
| Step 2 | Create Number Ranges for Vendor Accounts (XKN1)
Define unique number ranges for Vendor Master Data to ensure no duplication in your records. Use this transaction to display or edit number ranges and intervals. Monitor the current status of number ranges to avoid overlaps. Transaction code: XKN1
| Create the Supplier Record 1. In the Create Supplier dialog, enter:
2. Choose Tax Organisation Type (e.g., Corporation, Foreign corporation, Government agency, Individual, Partnership etc.) 3. Enter Tax Country 4. Enter Tax Registration Number Click Create to generate the supplier record
|
| Step 3 | Assign Number Ranges to Vendor Account Groups Link the number ranges created in the previous step to specific vendor account groups. This step ensures that each vendor is assigned a unique identifier based on the account group they belong to. Transaction Code: OBAS
| Complete Supplier Profile Details On the Edit Supplier page under the Profile tab, fill in:

|
| Step 4 | Maintain Number Ranges for Configuration Review and fine-tune number ranges for consistency and accuracy during vendor creation. This step is crucial for maintaining alignment across multiple systems. Transaction Code: BUCF
| Add Supplier Address First, go to the Address tab and click the Create icon. In the Create Address page, you will be asked to enter the following details:
Once you’re done filling in all the information, click Save and Close.
|
| Step 5 | Define Groupings and Assign Number Ranges Set up groupings and assign appropriate number ranges to business partner configurations. This step helps in maintaining standardised vendor data across SAP systems. Path: SPRO > IMG > Cross-Application Components > SAP Business Partner > Business Partner > Basic Settings > Number Ranges and Groupings > Define Groupings and Assign Number Ranges.
| Define Supplier Sites With the supplier selected, go to the Sites tab and click the Create icon. Now, in the Create Site page, enter:
Click Save. Note: You will not be able to access the Sites page unless you have a procurement agent role.  |
| Step 6 | Configure Number Assignment for BP to Vendor Establish a connection between business partner (BP) groupings and vendor account groups. This ensures automatic synchronisation of vendor data whenever business partner information is updated.
Path: SPRO > IMG > Cross-Application Components > Master Data Synchronisation > Customer/Vendor Integration > Business Partner Settings > Settings for Vendor Integration > Field Assignment for Vendor Integration > Assign Keys > Define Number Assignment for Direction BP to Vendor.
| Assign Site Details In the Receiving subtab, specify: 1. Ship to excessive action: Reject or Warn for wrong/excess shipments. 2. Receipt routing: Direct (to inventory), Standard (inspection), or Inspection 3. Overreceipt tolerance: Max % extra allowed 4. Overreceipt action: Warn, reject, etc. if tolerance exceeded 6. Late receipt tolerance: Days allowed after due date 7. Allow substitute receipts: Enable alternate items in place of the ordered ones 8. Receipt date exceptions: Rules for early/late receipts Go to the Site Assignments subtab and click Autocreate Assignments to assign the site to relevant business units. Click Save and Close.
In the Invoicing subtab, specify:Invoicing currency: In which the supplier will send invoices (e.g., USD, EUR).
|
| Step 7 | Use Transaction Code BP for Vendor Management In SAP S/4HANA, the Business Partner (BP) is the central entity for managing vendor, customer, and supplier data. By using transaction code BP, you can:
Click on organisation
Create BP role Select FLVN00 (FI)
Click on the Company code
Reconciliation account Sundry creditors GL map and save
| Add Supplier Contacts
Select the Supplier and open the Contacts tab. Now, click the Create icon and enter the following details of the supplier:
Finally, click Save and Close.
|


How to Register for a Vendor Code
This process involves making an entry for the vendor data in your database. Here is a step-by-step vendor code registration process for your quick review.
| Steps | Vendor Code Registration in SAP | Vendor Code Registration in Oracle |
| Step 1 | Onboard the Vendor
| Initiate Supplier Registration 1. External Registration: Share a registration URL with suppliers. They enter their email to get a one-time access code for secure form access. 2. Internal Registration: Employees can request supplier registration via the Suppliers work area, Sourcing, or Self-Service Procurement modules. |
| Step 2 | Verify Vendor Details Run a thorough background check about your vendor's credibility and compliance with your company's requirements. | Supplier Completes Registration Form The supplier will fill up the following details:
|
| Step 3 | Generate the Vendor Code Based on the collected details, assign a vendor code as per your internal coding format. | Review and Approval
|
| Step 4 | Record the Code in the System Enter the vendor code into your ERP or vendor management software for future reference. | Supplier Record Creation
|
| Step 5 | Confirm Registration: Notify the vendor that their registration is complete and provide them with their vendor code. | Confirmation The supplier receives a notification confirming their registration and assigned Supplier Number. |
How to Search for a Vendor Code
Finding a vendor code is a straightforward process, but it varies slightly across ERP systems like SAP and Oracle Fusion. This section will guide you through general methods to help locate supplier information quickly and accurately.
In SAP, use filters such as:
- Supplier Identifying Attribute – e.g., Supplier Name or Address Code
- Operator Attribute – e.g., Contains or Equals
You can combine both filters (e.g., Supplier Name Contains “ABC”) to narrow down your search effectively.
In Oracle Fusion, the search process differs slightly but follows a similar logic of using supplier attributes and filter options to locate vendor details quickly.
Steps | Searching for a Vendor Code in SAP | Searching for a Vendor Code in Oracle |
| Step 1 | Under the Supplier Manage, look for the Search area. | Under Procurement, go to Suppliers and then Manage Suppliers |
| Step 2 | You can select the following supplier attribute
They will fetch you supplier details they are intended for, entirely or in parts. | In the Manage Suppliers page, use the search criteria to look for:
|
| Step 3 | Now, choose the operator attribute. You can run a query to retrieve the vendor code using specific parameters, such as: 1. Begins with (Default): Show suppliers that begin with supplier query attribute 2. Contains: Show suppliers that include all of the search criteria in the order provided 3. Ends With: Show suppliers that end with the supplier query attribute 4. Equals: Show suppliers that match the search criteria exactly | Enter a keyword or exact value and click Search. You can refine results by applying additional filters such as country, supplier site, or active/inactive status. |
| Step 4 | Finally, type in the search query and operator attributes in the Search area and click enter. Results matching for search query will be displayed under Manage Suppliers. | From the results, click on the Supplier Name to view full profile details, including the automatically generated Supplier Number. |
Examples & Formats of Vendor Codes
A well-structured vendor code would look like this:
- ABC001: "ABC" represents the vendor's initials, and "001" is a numeric sequence.
- XYZ2023: Combines the vendor's name initials with the year of registration.
Common Vendor Code Formats
- Alphanumeric Codes: Combines letters and numbers (e.g., SUP123).
- Numeric Codes: Purely numeric, often sequential (e.g., 001234).
- Categorised Codes: Includes category-based prefixes (e.g., IT001 for IT vendors).
Benefits of Vendor Code
Using vendor codes offers numerous advantages for businesses:
- Improved Organisation: Vendor codes centralise vendor information, making it easier to manage and retrieve data.
- Enhanced Accuracy: Reduces errors in vendor-related transactions and records.
- Streamlined Communication: Simplifies referencing and communication between departments.
- Faster Processing: It allows fast access to the vendor details, making it easy to process invoices faster and pay faster.
- Regulatory Compliance: It helps keep records that are comprehensive for audit and regulatory purposes.
Frequently Asked Questions
About the Author

Tanya Gupta
A Chartered Accountant by profession and a content writer by passion, I've dedicated my career to unraveling the complexities of GST. With a firm belief that learning is a lifelong journey, I've honed my skills in simplifying intricate legal jargon into easily understandable content. The satisfaction of transforming complex tax laws into relatable narratives is what drives me. Read more
Clear offers taxation & financial solutions to individuals, businesses, organizations & chartered accountants in India. Clear serves 1.5+ Million happy customers, 20000+ CAs & tax experts & 10000+ businesses across India.
Efiling Income Tax Returns(ITR) is made easy with Clear platform. Just upload your form 16, claim your deductions and get your acknowledgment number online. You can efile income tax return on your income from salary, house property, capital gains, business & profession and income from other sources. Further you can also file TDS returns, generate Form-16, use our Tax Calculator software, claim HRA, check refund status and generate rent receipts for Income Tax Filing.
CAs, experts and businesses can get GST ready with Clear GST software & certification course. Our GST Software helps CAs, tax experts & business to manage returns & invoices in an easy manner. Our Goods & Services Tax course includes tutorial videos, guides and expert assistance to help you in mastering Goods and Services Tax. Clear can also help you in getting your business registered for Goods & Services Tax Law.
Save taxes with Clear by investing in tax saving mutual funds (ELSS) online. Our experts suggest the best funds and you can get high returns by investing directly or through SIP. Download Black by ClearTax App to file returns from your mobile phone.
Cleartax is a product by Defmacro Software Pvt. Ltd.
Company PolicyTerms of use
ISO 27001
Data Center
SSL Certified Site
128-bit encryption