Aadhaar Update History: How to Check & Download Aadhaar Update History Online?
The Unique Identification Authority of India (UIDAI) keeps records of your Aadhaar update history. You can check all your previous Aadhaar card update history, such as your address, mobile number, or name on your Aadhaar card. You can also view and download your Aadhaar update history in PDF format.
Continue reading to find out how to check and download your Aadhaar card update history online in just a few minutes.
Latest Update:
The last date for uploading documents online for Aadhaar updates is June 14, 2026. Citizens can update their name, address, and other demographic details on the UIDAI website.
What is Aadhaar Update History?
Aadhaar update history displays all crucial data related to an Aadhaar card’s updates since its allocation. An Aadhaar card holder can update/ change information in Aadhaar such as name, email ID, address, photograph, date of birth, etc., by visiting the offline centre or logging into the official website. All such changes get recorded, which you can know easily by getting access to your Aadhaar card’s update history.
So in case you detect any incomplete or incorrect information in your Aadhaar card, you can conveniently update it and get it corrected by following the appropriate procedure.
Details Available on the Aadhaar Update History Document
Below is the list of details you can check using the Aadhaar update history provision:
| Category | Features |
| Update Request Number or URN | A unique number assigned to Aadhaar card holders. |
| Aadhaar Update Date | It is the date when you raised the request for an Aadhaar update. |
| The User’s Photo | The cardholder's photograph is displayed in order to confirm his/her identity. |
| Demographic Information | It displays all details like gender, name, residential address, email Ids, contact number, etc. |
| Date and Time | It is the time and date when you checked the history of your Aadhaar card’s updates. |
How Can I Check My Aadhaar Update History?
UIDAI provides the option to check your Aadhaar update history online. All you need to do is navigate to the official website of UIDAI (www.uidai.gov.in) and follow the instructions below:
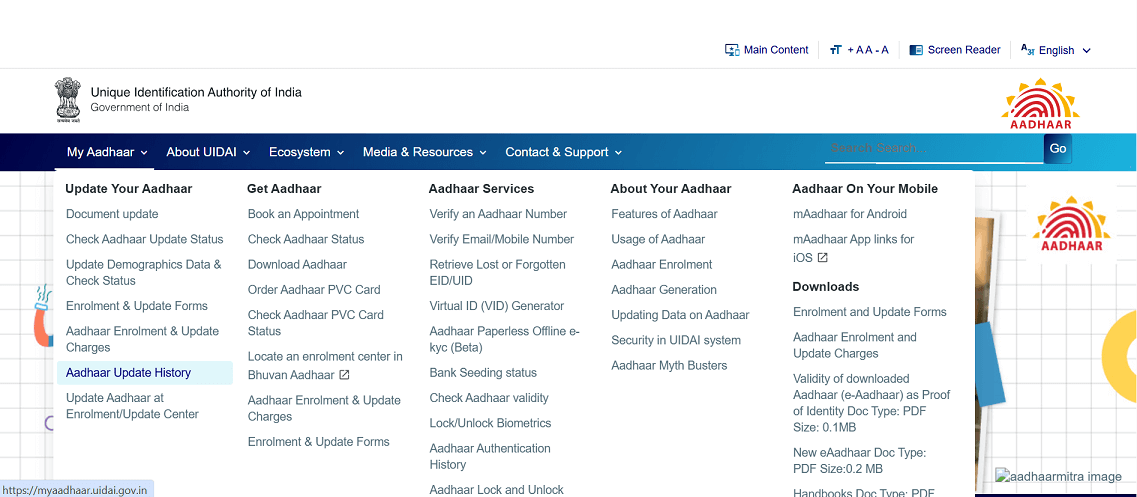
Step 1: Click on “My Aadhaar” and then on the “Aadhaar update history” option available under the “Update Your Aadhaar” section.

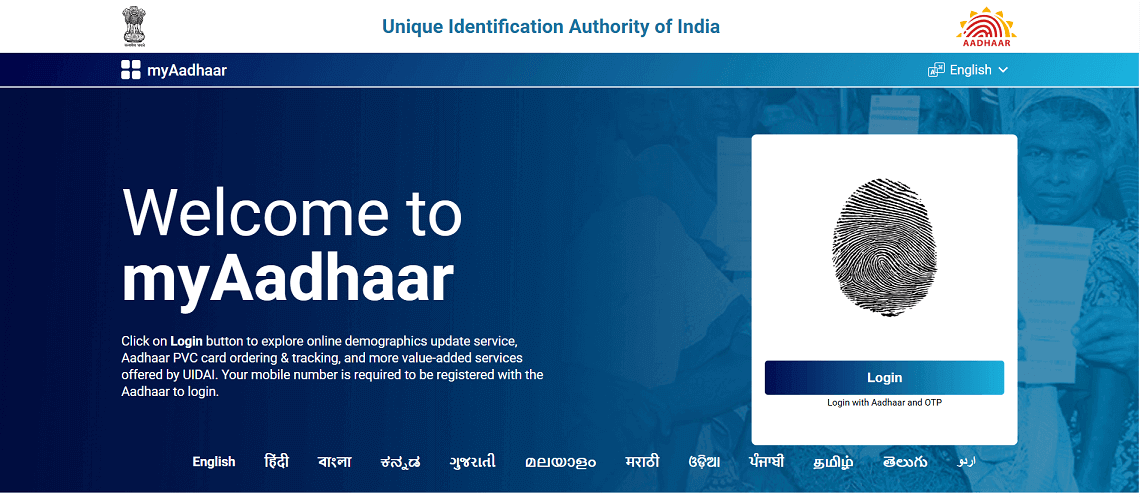
Step 2: Click on “Login”. Enter your Aadhaar number, captcha code and click “Login with OTP”. Enter the OTP and click “Login”.

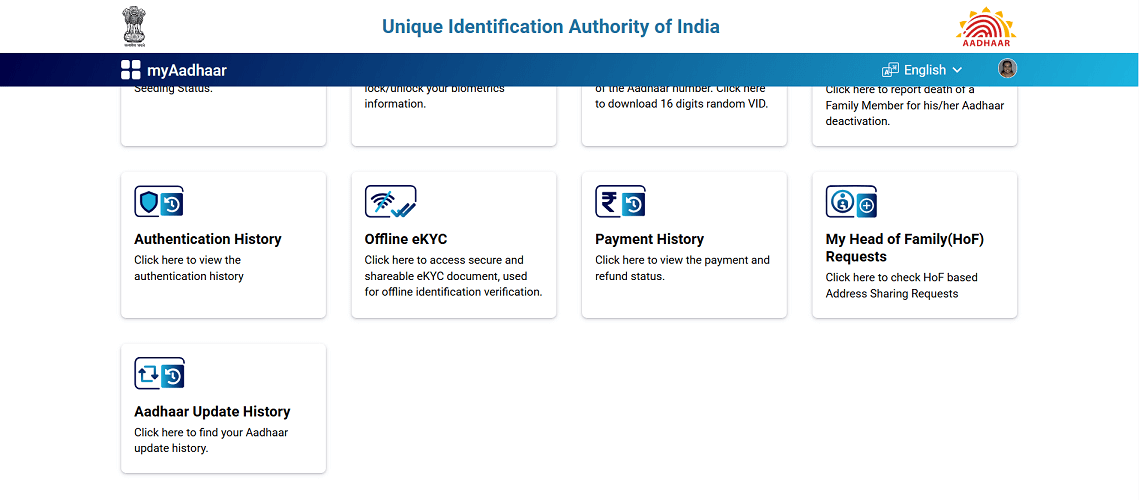
Step 3: Scroll down and click on “Aadhaar Update History” tab.

Step 4: You will be able to see your Aadhaar card’s updates on your screen.
How Can I Download My Aadhaar Card History PDF?
You can follow these simple steps to download the PDF format of your Aadhaar card update history:
Step 1: Visit the official website of UIDAI and click on “My Aadhaar”.
Step 2: Click the “Aadhaar Update History” under the “Update Aadhaar” section. Enter the details here and view all the updates you have made so far.
Step 3: Now, on the extreme right-hand side of the “Aadhaar update history” page, click on the three vertical dots.
Step 4: Select the “Print” option to print it immediately or save it as PDF. For future reference, you can also take a screenshot of the Aadhaar update history webpage.
How Can I Check My Aadhaar Card Update Status?
The provision of checking your Aadhaar update status online on the official website of UIDAI is free. Here is the step-by-step guide you need to follow:
Step 1: Visit the official website of UIDAI and click “My Aadhaar” on the home page. Navigate to “Check Aadhaar Update Status” under the “Update Your Aadhaar” section.
Step 2: Enter the Enrolment ID mentioned on the update acknowledgement slip.
Step 3: Enter the captcha code and click “Submit”. You will see the Aadhaar card update status in the following format:
- Draft Stage
- Payment Stage
- Verification Stage
- Validation Stage
- Completed
However, in case you have lost the acknowledgement slip, you can check your Aadhaar status online by following these steps:
Step 1: Visit the website of myAadhaar to retrieve your enrolment number and click on the “Retrieve Aadhaar number/EID/SID” tab.
Step 2: In the required section, enter your name, mobile number or email address and security code to get an OTP on your registered mobile number.
Step 3: Now, enter the OTP and click the “Verify OTP” option.
Step 4: After verification, you will receive an enrolment number on your mobile number or email address. You can check the status of your Aadhaar by using this enrolment number.
Things To Remember When Checking Aadhaar Update History
Below are some pointers you should keep in mind when you are checking your Aadhaar update history.
- Make sure to link your mobile number with your Aadhaar to avail of this facility.
- The whole procedure is an online facility; therefore, you cannot visit the Aadhaar enrolment centre in your area to seek help.
- You can use the 12-digit Aadhaar number to check your Aadhaar update history.
The Aadhaar update history feature by UIDAI provides a secure way to track all changes made to your Aadhaar profile. Whether you need to verify modifications or download your Aadhaar update history PDF, this service ensures transparency. You can stay updated by checking your UIDAI Aadhaar update history regularly for accuracy and record-keeping.
